I: How to Create Fire
- Go to File > New to open a dialog box for a new file. Set the width to 800 pixels and the height to 450 pixels. Set the resolution to 150 pixels/inch. Under Contents make sure that white is selected. Click Ok to create a new image.
- Click the Default Foreground and Background Colors button in the toolbox to make the foreground color black and the background color white.
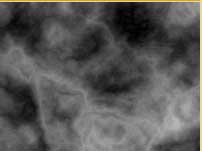
- Go to the menu bar and select Filter > Render > Clouds. Use Ctrl F (Mac=Cmnd F) to reapply the filter until you are satisfied with the appearance of the clouds.
- Go to Filter > Render > Difference Clouds. The Difference Clouds filter blends with the Clouds filter effect creating a more complex shape. Continue to press Ctrl F (Cmnd F) at least three to five times until you see flame shapes along the bottom of the image.
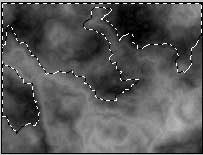
- Select the Lasso tools from the tool box and use it to select the unwanted areas of texture that above the flame shapes. Note: draw along the edge of dark and light areas.
- Make sure that the default colors are still selected (black =foreground and white =background.) Go to Edit > Fill to fill the unwanted areas within the "marching ant"s. Go to Select > Deselect in the menu to remove the "marching ants".
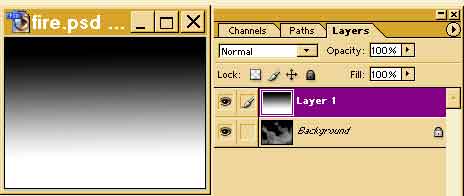
- Go to the drop-down arrow in the upper right corner of the Layers palette. Select New Layer.
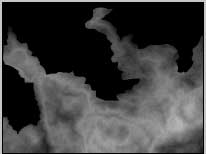
- Select the Gradient tool from the toolbox. The default foreground and background colors are still selected. Click the Linear Gradient button on the Options bar. Drag from the top to the bottom of the image.
- With Layer 1 still selected in the Layers palette, open the LayerStyle drop-down list in the upper left corner of the Layers palette. Select Soft Light to make the lower portion of the image brighter.
- Go to the drop-down arrow again and select Merge Down to merge the two layers.
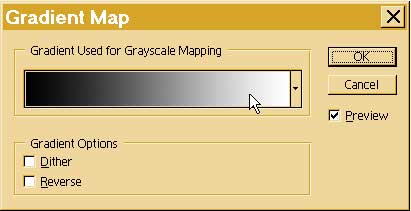
- To color the flames go to the menu bar and select Image > Adjustments > Gradient Map. Click the Gradient Used for Grayscale Mapping box to open the Gradient Editor.
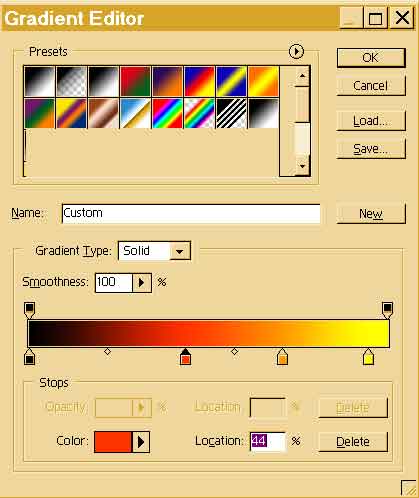
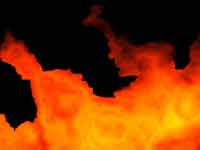
- Create a four color gradient consisting of black, red, organge and yellow. Click the first gradient preset (arrows at bottom of the gradient bar) to create a color stop. When a color stop is selected it turns black. Click the Color box at the bottom of the dialog box and select the first color. The leftmost color preset is already black. The next color to select is red. Double click on the far right color stop to change its color then drag it to the left to position it in the gradient. To delete a color stop drag it down off the bottom of the preview bar. Click Ok to close the Gradient Editor and click Ok again to apply the gradient.
- Use the Crop tool or the Rectangular Marquee tool to edit select a portion of the image that you want to include in a composition. Choose Image > Crop > from the menu bar to delete areas outside the selection.
- Save your work.
Copyright © 2006, Christalene Loren. All rights Reserved.